'%3e%3cpath%20d='M150.127%20195.325C233.04%20195.325%20300.255%20168.696%20300.255%20135.848C300.255%20103%20233.04%2076.3709%20150.127%2076.3709C67.2143%2076.3709%200%20103%200%20135.848C0%20168.696%2067.2143%20195.325%20150.127%20195.325Z'%20fill='white'/%3e%3cpath%20d='M231.093%20118.256L150.117%20-0.000183105L69.1527%20118.256C68.1365%20119.748%2067.5967%20121.294%2067.5967%20122.871C67.5967%20136.017%20104.538%20146.666%20150.117%20146.666C195.697%20146.666%20232.638%20136.007%20232.638%20122.871C232.638%20121.294%20232.098%20119.748%20231.082%20118.256H231.093Z'%20fill='%2301A9F2'/%3e%3cpath%20d='M150.106%20356.844L98.7265%20281.5L62.3035%20311.117L25.4253%20257.017L50.787%20239.721L68.8556%20266.226L105.279%20236.62L150.106%20302.363L194.934%20236.62L231.357%20266.226L270.045%20209.48L295.407%20226.776L237.898%20311.117L201.475%20281.5L150.106%20356.844Z'%20fill='white'/%3e%3cpath%20d='M592.168%20165.22V237.908H561.482V171.825C561.482%20153.884%20551.807%20143.034%20535.051%20143.034C516.644%20143.034%20505.318%20156.011%20505.318%20175.604V237.908H474.875V171.349C474.875%20153.407%20464.968%20142.791%20448.445%20142.791C429.804%20142.791%20418.711%20156.011%20418.711%20176.07V237.908H388.025V118.964H418.711V134.301C426.502%20122.033%20440.421%20115.418%20458.13%20115.418C477.014%20115.418%20490.7%20122.975%20498.247%20135.953C506.747%20123.208%20521.608%20115.418%20540.725%20115.418C572.819%20115.418%20592.179%20135.476%20592.179%20165.22H592.168Z'%20fill='white'/%3e%3cpath%20d='M899.48%2080.2534C899.48%2068.2182%20909.388%2059.4856%20920.248%2059.4856C931.574%2059.4856%20941.248%2068.9274%20941.248%2080.2534C941.248%2091.3465%20931.574%20100.788%20920.248%20100.788C909.155%20100.788%20899.48%2092.0557%20899.48%2080.2534Z'%20fill='white'/%3e%3cpath%20d='M935.832%20118.955H905.146V237.899H935.832V118.955Z'%20fill='white'/%3e%3cpath%20d='M1140.2%20118.955H1173L1099.84%20288.644H1067.5L1090.6%20237.666L1043.42%20118.955H1076.45L1107.37%20204.81L1140.18%20118.955H1140.2Z'%20fill='white'/%3e%3cpath%20d='M883.182%20115.418H815.904C781.45%20115.418%20755.008%20137.837%20755.008%20171.825C755.008%20206.756%20778.846%20228.466%20815.904%20228.466C831.951%20228.699%20847.288%20231.059%20847.288%20246.64C847.288%20259.617%20835.962%20267.175%20817.555%20267.175C799.148%20267.175%20784.985%20254.664%20781.915%20239.326L756.66%20246.873C763.741%20274.722%20787.346%20292.188%20817.312%20292.188C856.963%20292.188%20876.313%20272.838%20876.313%20249.233C876.313%20234.605%20869.231%20223.036%20855.545%20215.721C868.522%20206.047%20877.022%20190.709%20877.022%20171.825C877.022%20160.986%20871.412%20149.3%20863.145%20140.674H883.182V115.418ZM815.904%20203.919C797.264%20203.919%20782.392%20192.117%20782.392%20171.825C782.392%20151.534%20799.148%20139.964%20815.904%20139.964C832.66%20139.964%20849.416%20151.29%20849.416%20171.825C849.416%20188.814%20835.497%20203.919%20815.904%20203.919Z'%20fill='white'/%3e%3cpath%20d='M737.426%20237.906V118.962H708.158V136.088C698.685%20121.481%20682.796%20115.426%20668.983%20115.426C633.587%20115.426%20608.087%20143.509%20608.087%20179.148C608.087%20214.788%20633.1%20241.452%20668.03%20241.452C682.426%20241.452%20698.24%20235.08%20708.148%20220.917V237.906H737.415H737.426ZM673.471%20213.835C653.645%20213.835%20638.308%20199.207%20638.308%20178.429C638.308%20157.65%20653.889%20143.032%20673.704%20143.032C694.705%20143.032%20709.1%20160.021%20709.1%20178.429C709.1%20196.836%20694.472%20213.835%20673.46%20213.835H673.471Z'%20fill='white'/%3e%3cpath%20d='M1003.29%20111.085C1003.29%2098.5315%201011.17%2091.8842%201023.98%2091.8842C1028.9%2091.8842%201033.83%2092.6251%201037.77%2093.853L1042.2%2068.0043C1038.02%2066.7765%201027.43%2064.7971%201021.27%2064.7971C994.18%2064.7971%20972.607%2081.786%20972.607%20110.355V118.961H956.889V144.216H972.607V164.519V237.915H1003.29V144.216H1038.46V118.961H1003.29V111.096V111.085Z'%20fill='white'/%3e%3c/g%3e%3cdefs%3e%3cclipPath%20id='clip0_1_3'%3e%3crect%20width='1173'%20height='356.842'%20fill='white'/%3e%3c/clipPath%3e%3c/defs%3e%3c/svg%3e)

DT Exchange
This guide explains how to set up a DT Exchange (Fyber) monetization data grabber in the Magify analytics system.
The grabber enables the automated import of monetization data, including ad revenue, impressions, eCPM, ad unit performance, and other AdMob-specific metrics from your Digital Turbine account into your analytics pipeline.
Getting Started
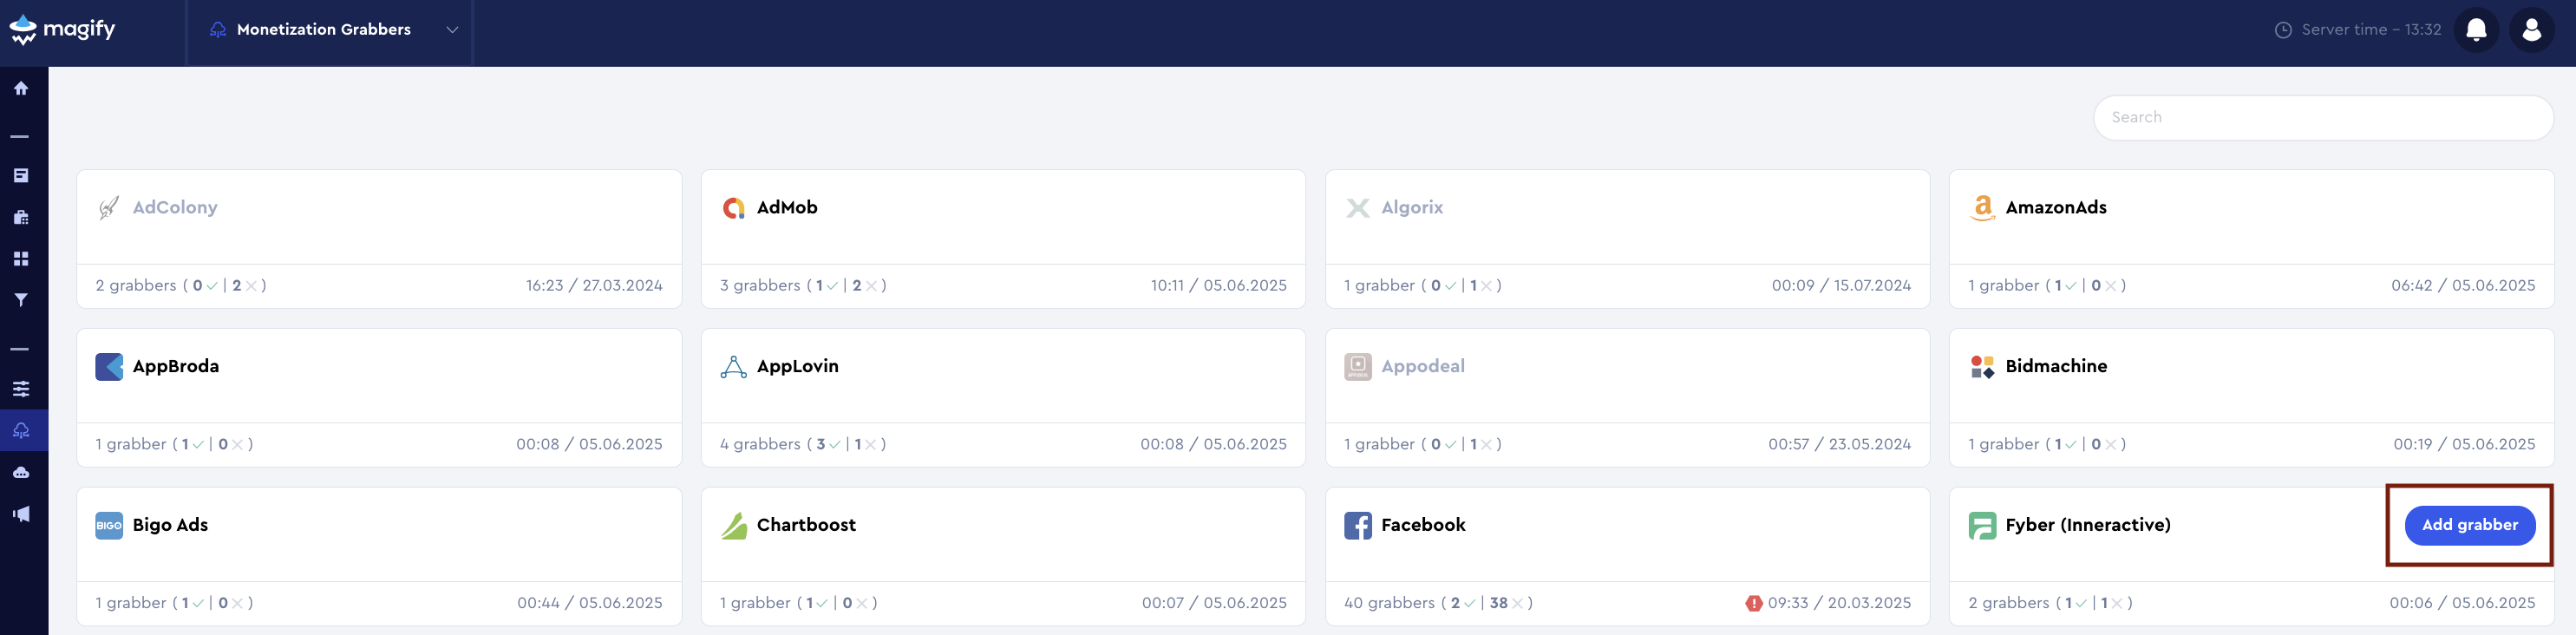
- Navigate to Configurations > Integration > Monetization Grabbers in the Magify interface.
- Find DT Exchange in the list and click Add Grabber to create a new data source.
- A configuration form will open.
This form is used to connect Magify to your Digital Turbine (DT Exchange) account by providing the required credentials: Publisher ID, Consumer Key, Consumer Secret, Reporting Client ID, Reporting Client Secret, App ID, and a custom integration name.
General Settings
Form Overview
- Top Section – General connection parameters: integration name, organization, and API credentials.
- Applications Section – A list of individual DT Exchange applications to be synced.
Each field in the form is described below:
Name
A descriptive name for the grabber configuration. Helps identify the data source among other integrations.
Recommended format: DT Exchange Grabber [CompanyName]
Optional field – recommended to fill in for easier navigation.
Organization
Select your organization from the dropdown list.
Consumer key, Consumer secret, Publisher ID
Used to authenticate access to your Digital Turbine (DT Exchange) Basic Reporting API account.
- Publisher ID – A unique identifier for your Digital Turbine account. Required for all API requests to associate them with your reporting data.
- Consumer Key – A public key used to initiate secure API requests. Works together with the Consumer Secret for authentication.
- Consumer Secret – A confidential key used in combination with the Consumer Key to authorize and validate API access.
How to obtain them:
- Log in to your Digital Turbine account and open the DT Console.
- Navigate to your User Profile.
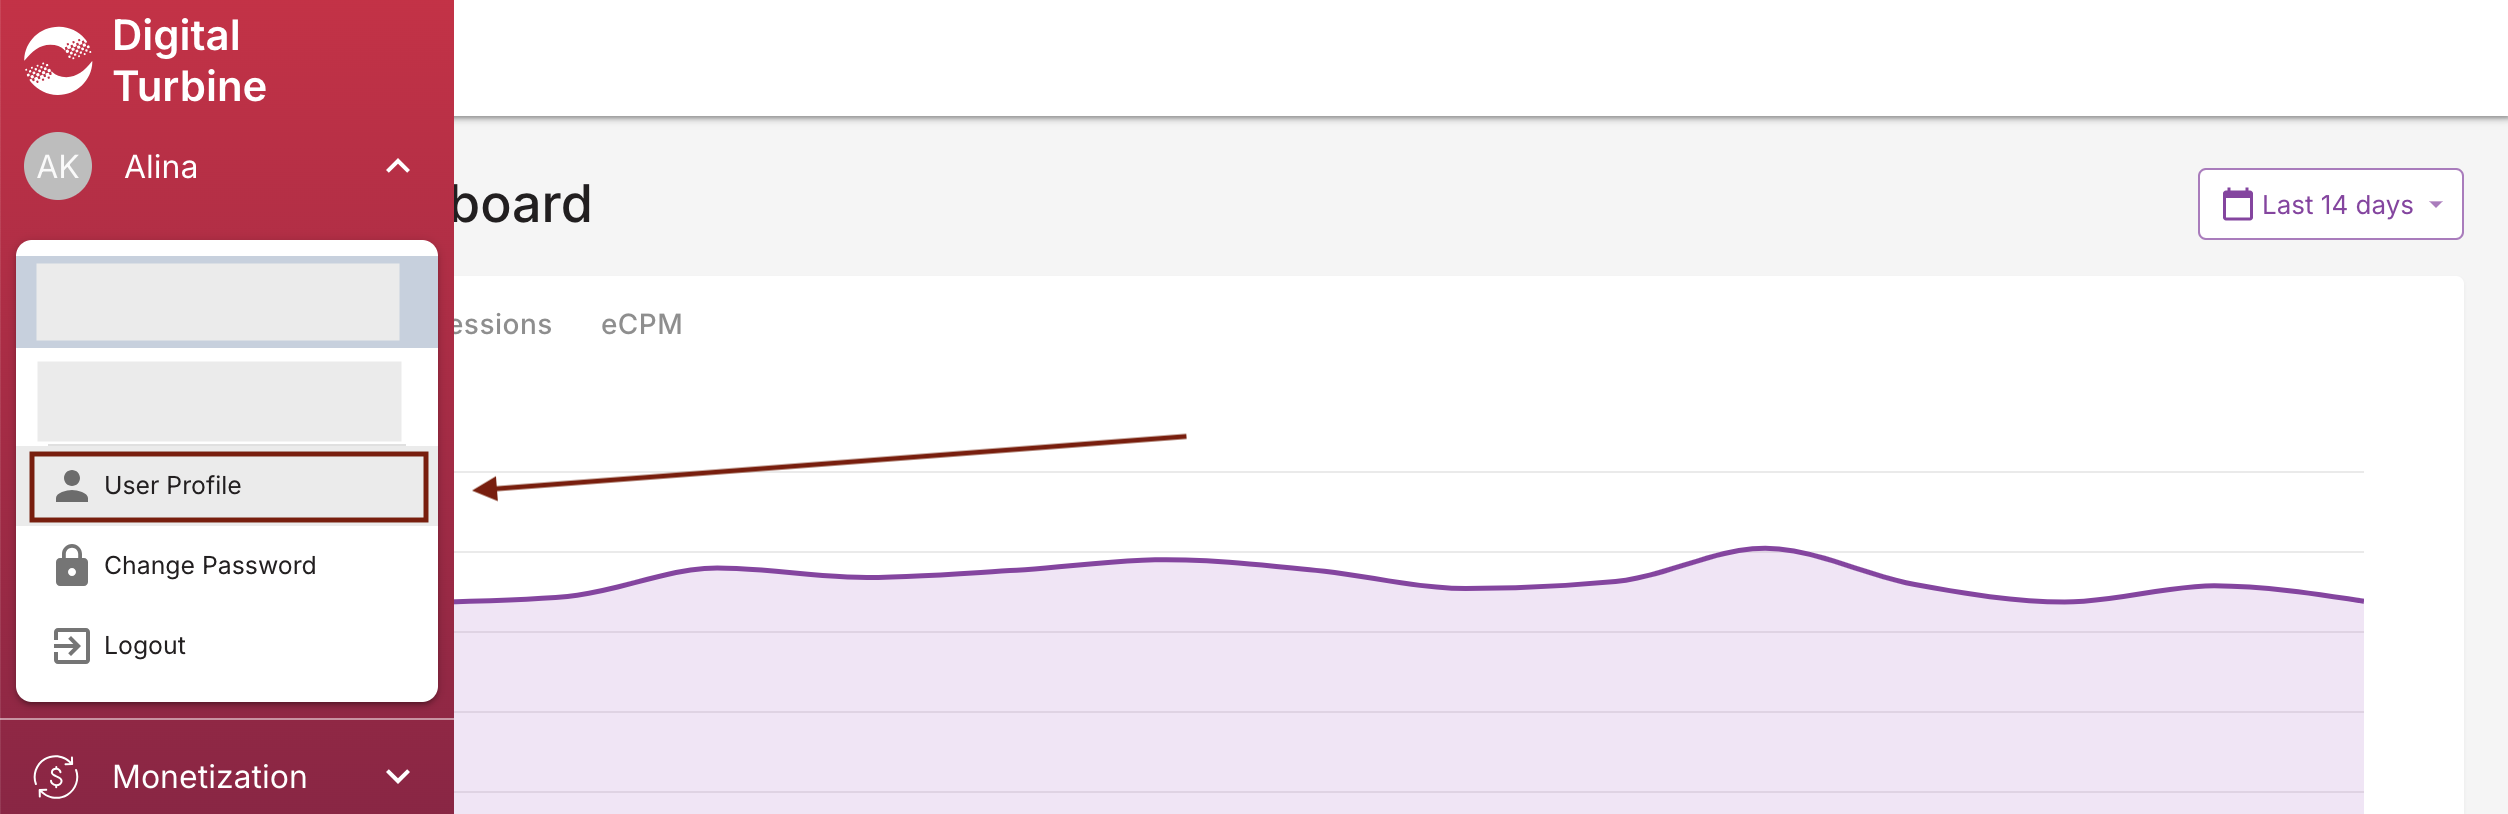
- Scroll down to the Basic Reporting API – Credentials section.
- Copy the Publisher ID, Consumer Key, and Consumer Secret.

Reporting Client ID and Reporting Client Secret
Used to authenticate access to your Digital Turbine (DT Exchange) Advanced Reporting API account.
- Client ID – A public identifier for your application. Required to initiate requests to the Advanced Reporting API.
- Client Secret – A private key paired with the Client ID. Used to securely authorize and authenticate API access.
How to obtain them:
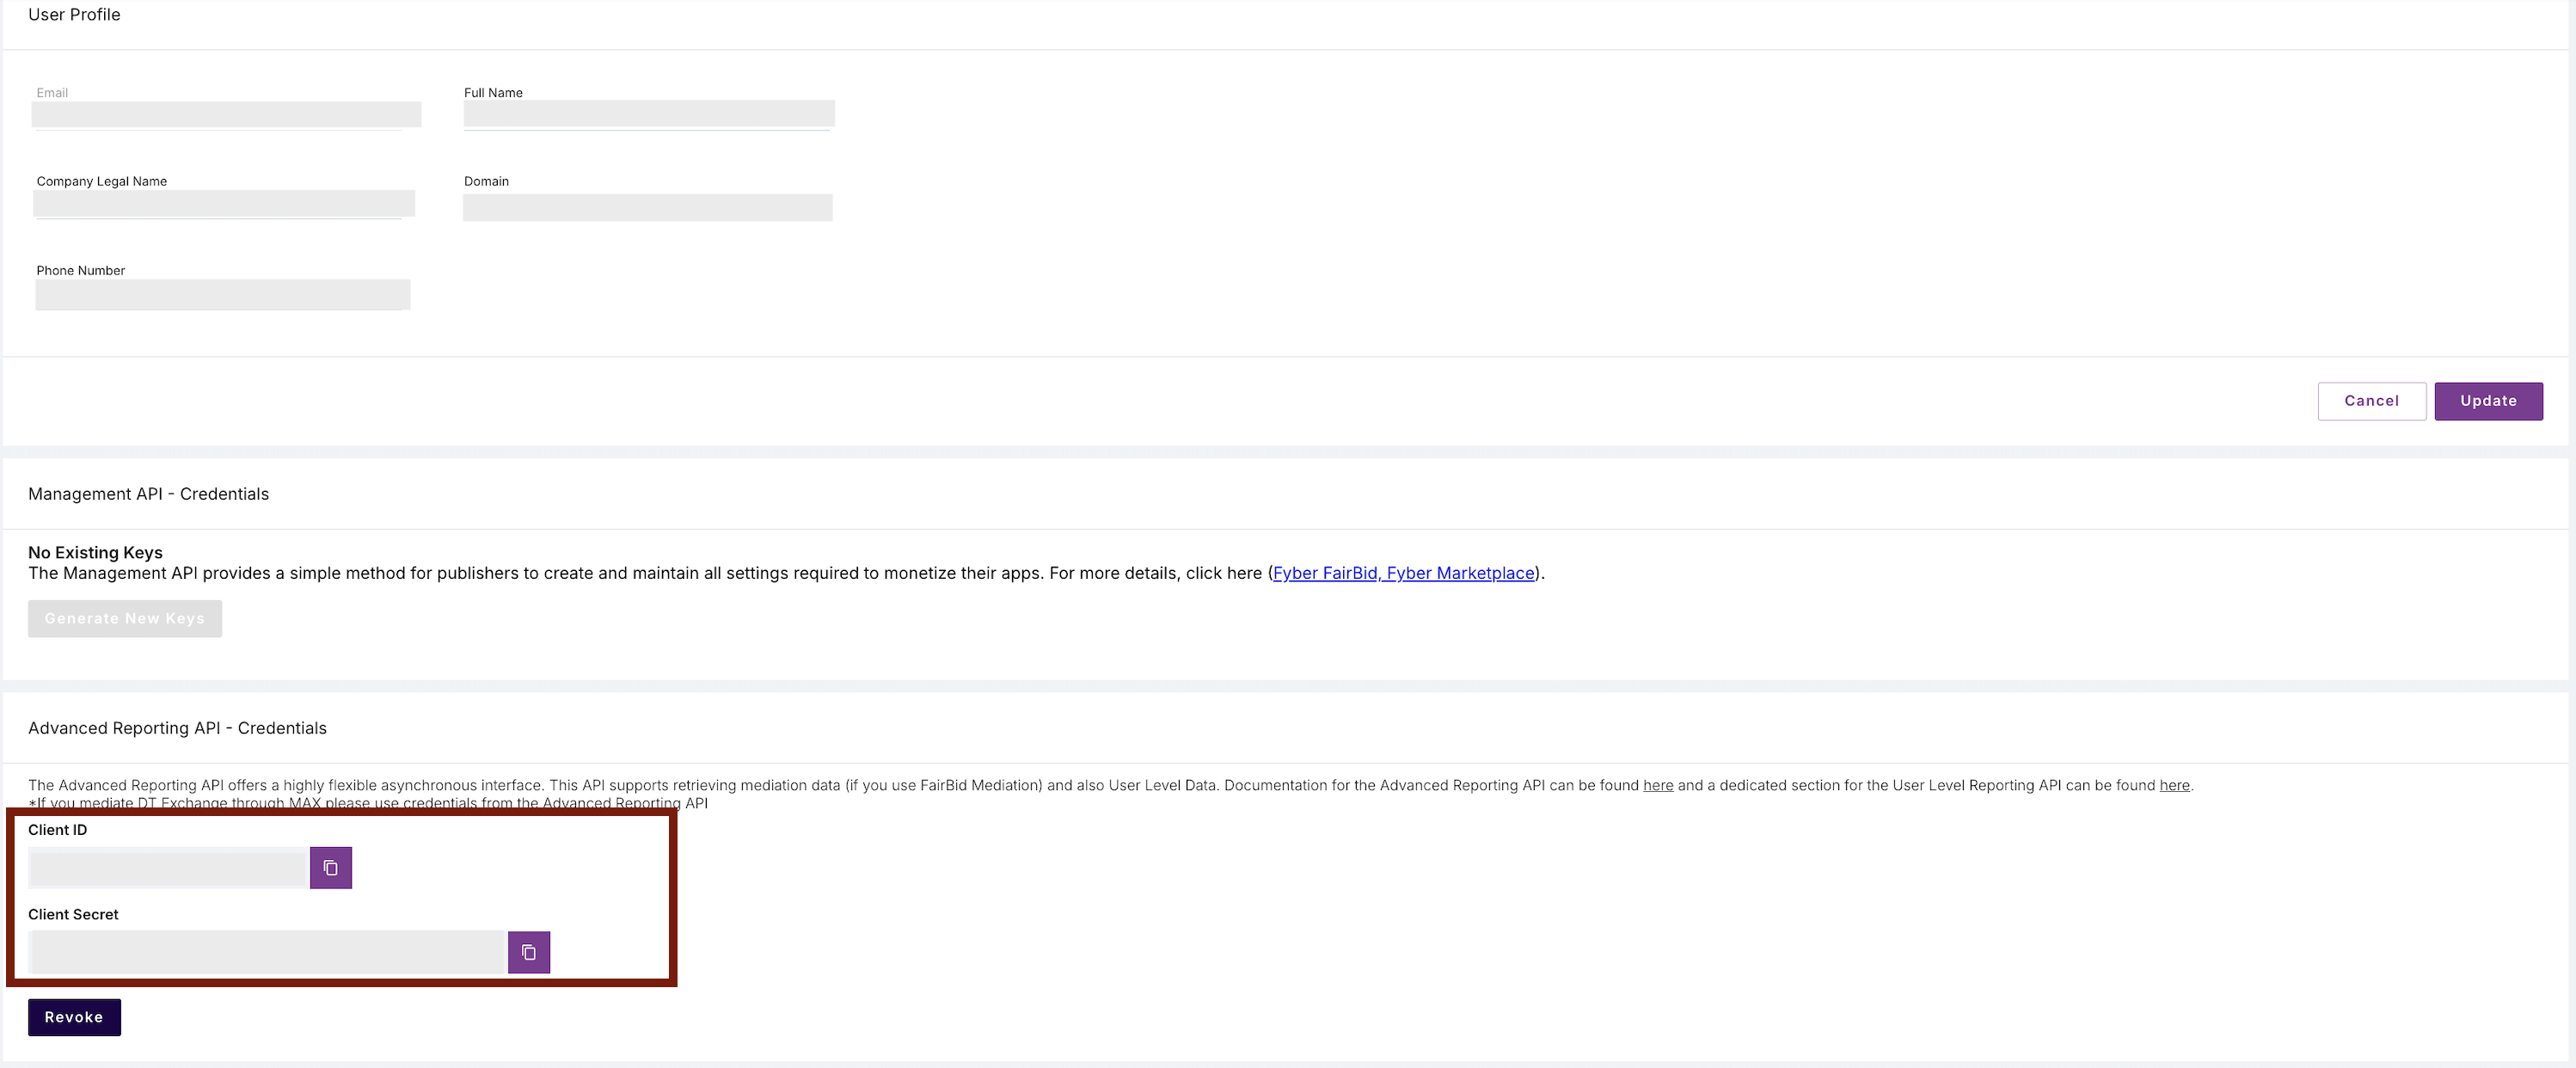
- In your User Profile, scroll down to the Advanced Reporting API – Credentials section.
- Copy the Client ID and Client Secret.
Is Enabled
Enable this option to start collecting data immediately. If left unchecked, the configuration is saved but inactive.

Application Section
Use this section to configure individual applications for data synchronization with DT Exchange.
Each field serves the following purpose:
App ID
Used to identify your application within the Digital Turbine (DT Exchange) platform for data syncing and reporting purposes.
How to find it:
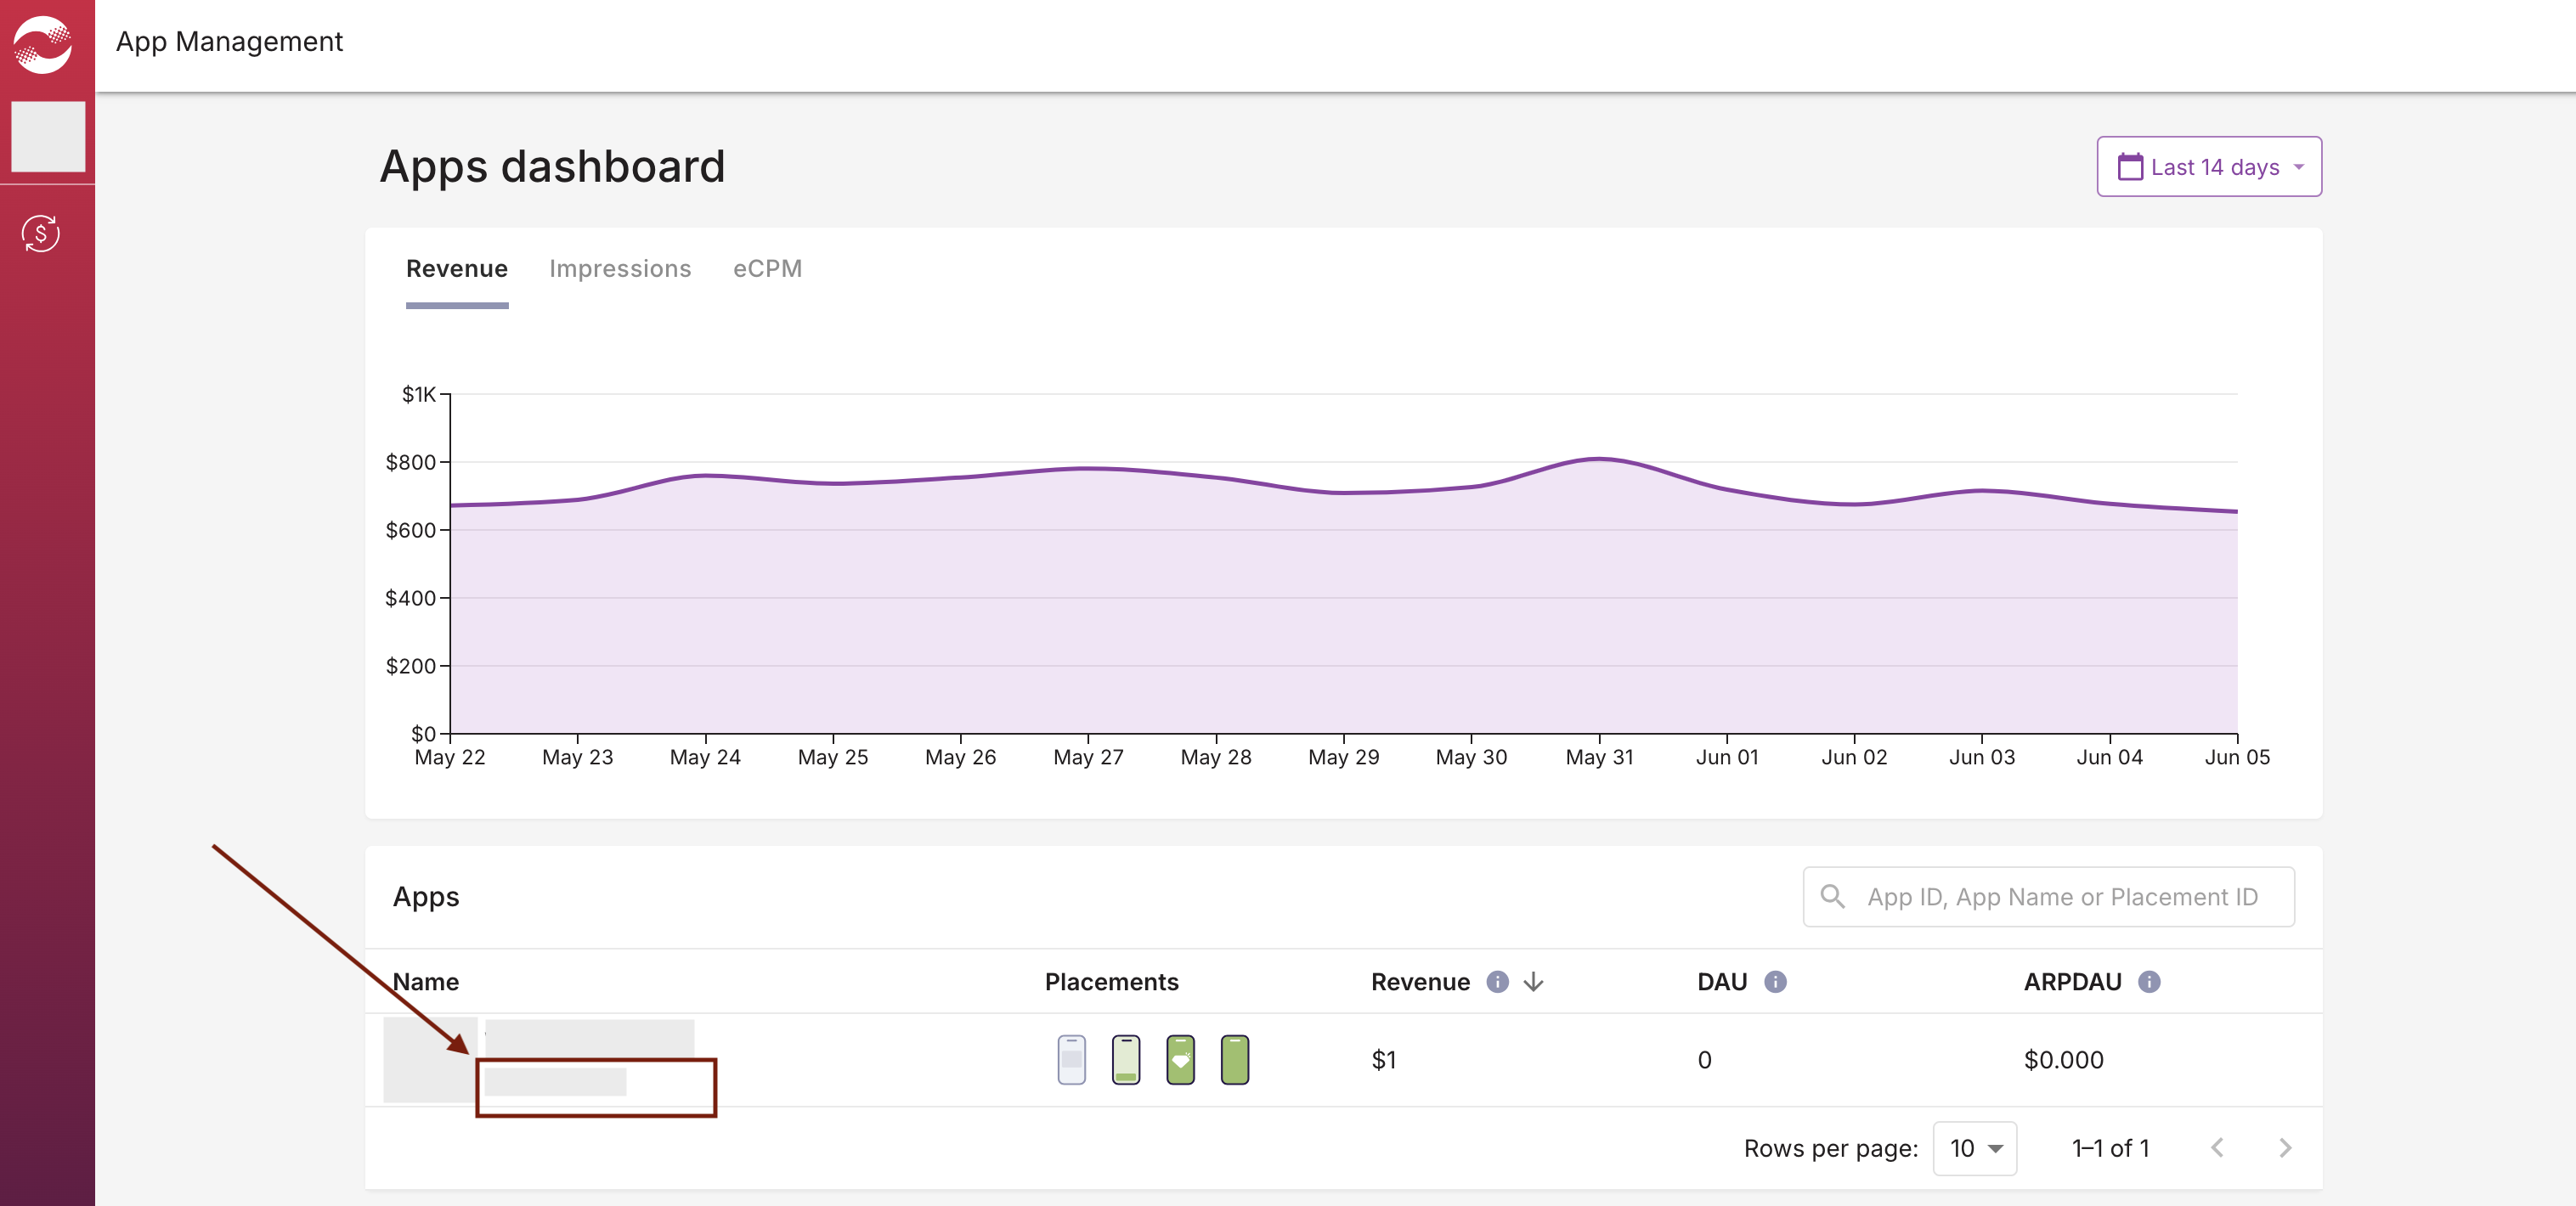
- Log in to your Digital Turbine account and open the DT Console.
- From the left-hand menu, click Monetization > App Management.

- The App Management dashboard will open. In the Apps table below the graph, locate your application by name.
- The App ID will be displayed directly under the app name.
Alternatively:
- In the App Management dashboard, click on your app to open the App Details page.
- The App ID will be displayed at the top, next to the app status
Application
Select the corresponding application(s) from the dropdown list.
Click + Add Applications to include additional apps from your account.
Saving the Configuration
Once all required fields are filled in, click Save to complete the setup. The enabled grabber will then begin collecting data from HyprMX according to the configured schedule.
By default, each grabber is set to load data for one day upon creation.
If you need to collect data for a longer period (e.g., for initial setup or data recovery), please contact us. We can manually adjust this value for you.